
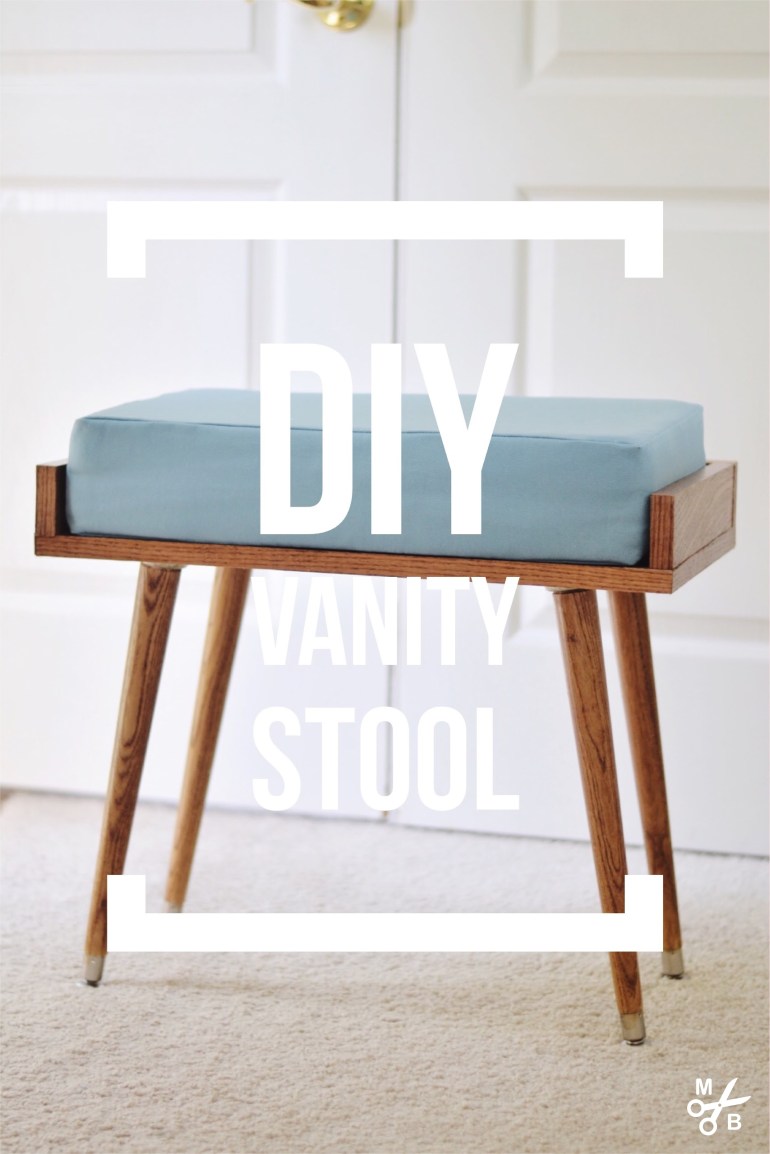
I am finally ready to share my first DIY furniture I built for my new place! Everything took longer than expected, but it’s because I made five things and was only working on them on weekends.
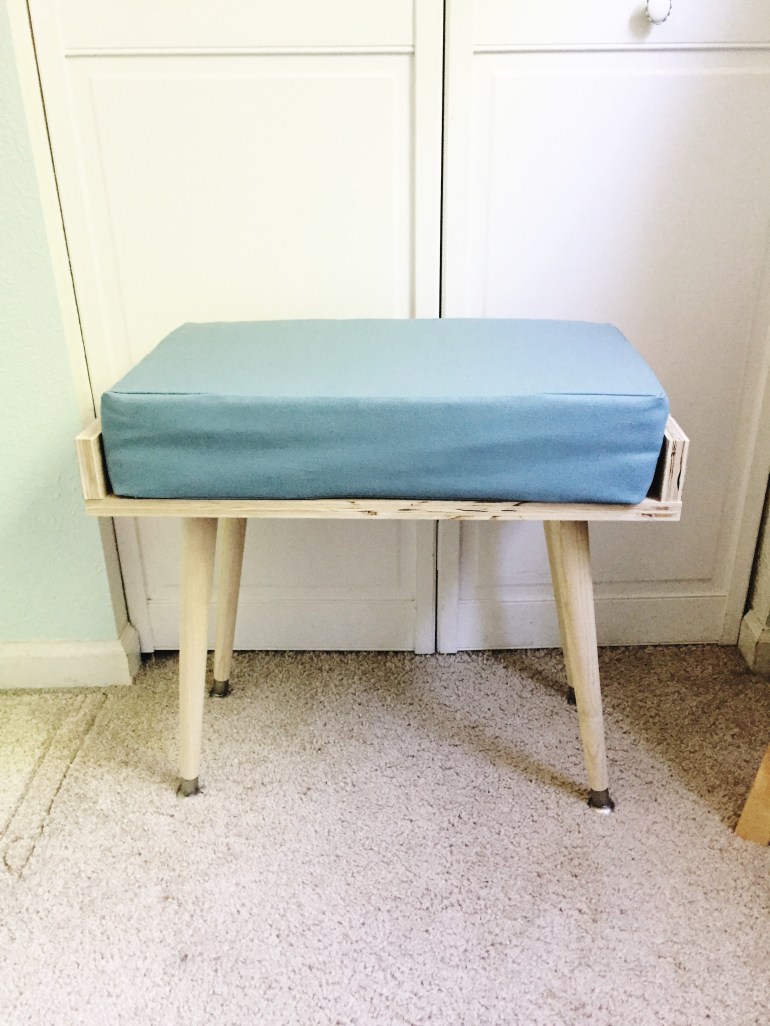
I saw this stool while furniture hunting online and I immediately wanted to make my own. I knew I could make it for less than the $100 price tag:

For the cushion, I picked up some duck canvas fabric from Joann and foam from Walmart. I wanted the cushion to fit snugly on the bench so I made it the same dimension as my seat (21″ x 12″ x 4″). I cut each foam piece into a 12″ by 21″ rectangle. You can use spray adhesive to join the two pieces together, but I decided not to. Stacked together they create are 4″ tall.
For the zippered cushion cover, I cut 4 pieces of fabric, adding on ¼ ” seam allowances on all sides, extra length on the boxing, and an extra inch to the zipper panel: top (21 ½” x 12 ½”), bottom (21 ½” x 12 ½”), zipper panel (5 ½” x 24″) and boxing panel (48″ by 4 ½”).
I used this video as my instructions for the cushion:
I followed these instructions pretty closely, except for the handle. Instead of cutting my zipper short like shown in the video, I used a zipper two inches shorter than my intended cushion length and it was perfect.
I suggest watching this video a few times, and also while you’re sewing. I found that I did not line up my boxing and cushion correctly which pulled the fabric in a few places and left me extra in others. I ended up having to add a few small pleats to tuck away the extra fabric. Once complete, I sprayed my cushion with two coats of scotch guard to help protect it since it will be my vanity stool. Sorry for the lack of photos during the process of making the cover.

For the bench, I purchased a 4′ by 8′ sheet of 3/4″ red oak veneer plywood from Home Depot. Home Depot can cut a few cuts of the plywood for you ( which helps to get it in the car!), just plan out ahead of time what cuts you will need. I used MaxCut to plan all of my cuts since I was cutting wood for five projects out of one sheet. I ended up cutting everything at home with the help of my dad. My dad is great with power tools and has years of experience building and cutting, so I was really grateful to have his help. If you have a friend or relative that can help you cut the wood, get their help! Power tools are dangerous so it is best to get someone who knows what they are doing.
Because the wood I bought had a thin veneer, I used a fine tooth blade to cut the wood. A blade with more teeth will rip the wood and give you a bad cut (another reason I was nervous about getting the wood cut at Home Depot). I also used blue tape on any cross grain cuts (perpendicular to the grain) to prevent splintering. For some great tips and information on cutting wood, tools and project ideas check out Steve Ramsey.
Dimensions for the bench: seat (22 ½” x 12 ¾”), sides x 2 (12″ x 2 ½”), back (22 ½” x 2 ½”). The legs are pre-made legs you simply screw in!
Once I cut the wood, I placed the pieces together to make sure my cushion fit – it didn’t! Because I didn’t sew the cushion correctly (and probably didn’t give myself enough seam allowance) the cushion was smaller than originally planner. I just adjusted the seat and cut away the extra inch from the seat and back panel. Once it was the right size, I screwed it together with 1 ¼” screws.
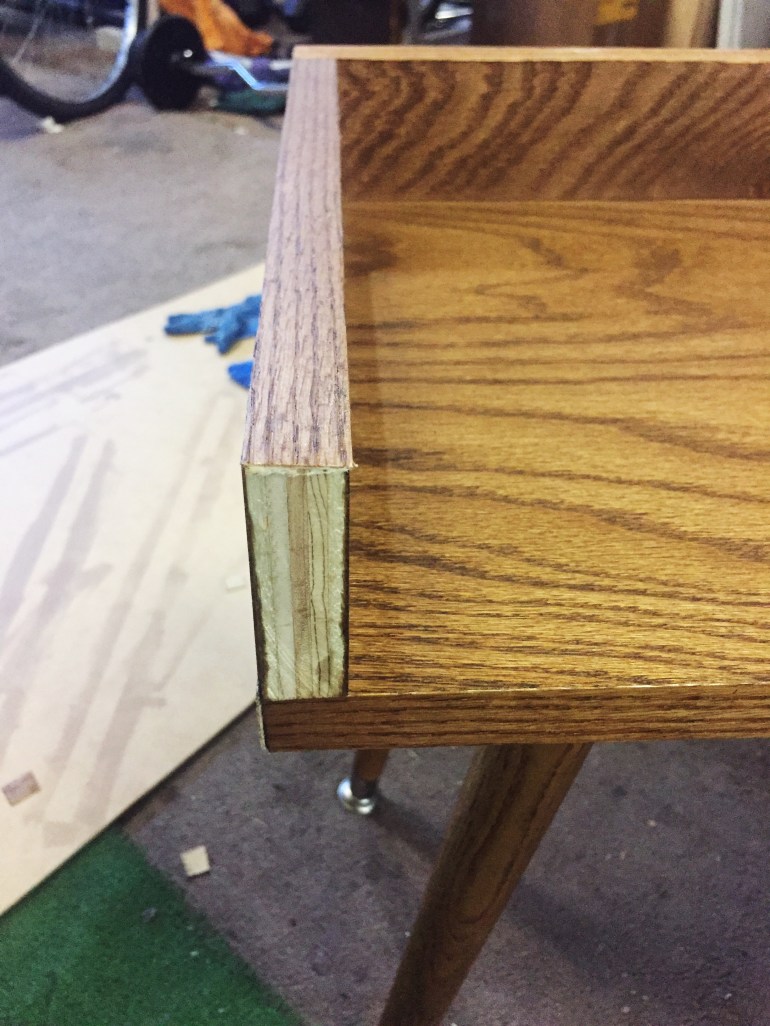
I lightly sanded my wood with a 220 grit sand paper once assembled. If you’d like to finish the edges that show the plywood layers, I recommend doing so now. I used an iron-on veneer banding that was easy to apply and looked great. I messed up however and added it after I had done my stain (below you can see what the stained banding looks like vs the raw plywood). The problem here is that you will need to trim a little bit of the banding once it is adhered to the wood with a utility knife. I ended up scratching my wood and has to re-stain small bits.
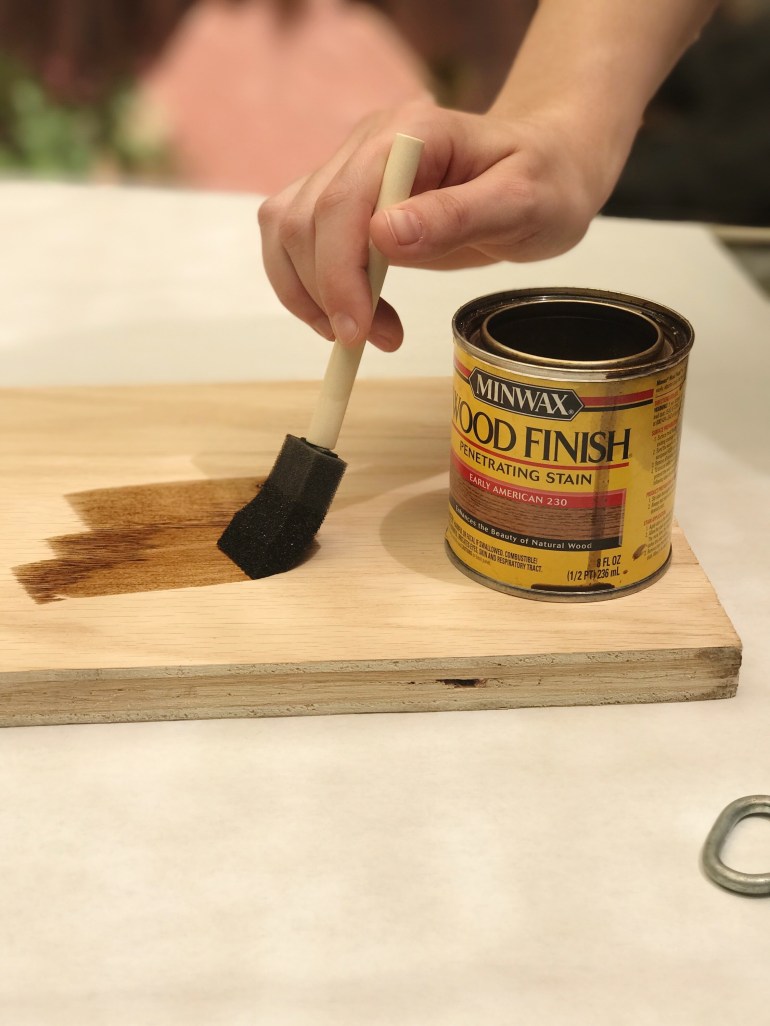
Once you have your banding on and trimmed, stain & seal the wood. I used Minwax stain in the color Early American for my bench. I sealed it with two coats of MinWax Clear Satin Polyurethane. Follow the instructions on your stain and polyurethane for proper application and drying time.
Once dry, you have a lovely vanity stool! The only thing I would change is using solid wood for the sides. My original idea was to use a router to round the top edges of the side, but learned that it might not turn out well with plywood. I decided to stick with the plywood sides and use the edging tape to finish it instead.

If this inspires you to try woodworking, let me know! Also stay tuned for my other furniture projects!

Where did you buy the stool legs?
LikeLike
I got them from either Homedepot or Lowes, don’t remember
LikeLike