
When I planned to have March as my sewing month, I had no clue I’d be stuck at home 24/7. I hope you’re practicing healthy hygiene and staying healthy during this crazy time! I hope this blog post provides a little bit of an escape for you.
My goal for March was to put a dent in my growing fabric collection and actually sew some things. The first project I decided to tackle was making something with (faux) leather and I landed on recreating this fun bucket bag I found on Pinterest from Shein.
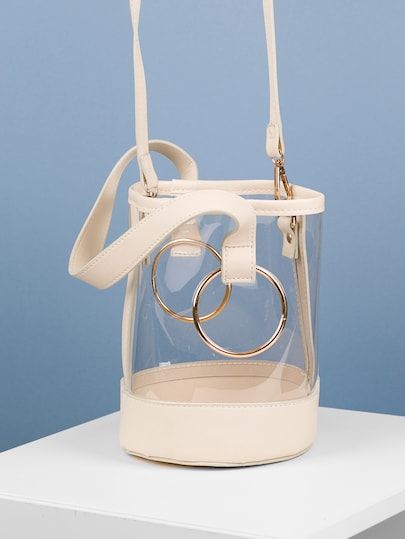
I’ve had a yard of faux leather stored in my closet for the last three years, and I really wanted to use it to make something fun. This bag didn’t take much fabric, so I have plenty left to make a few more things.

Could I have done a better job on this? YES. But it was honestly just fun to practice sewing with a material i’ve never worked with before. This is a real reason that leather goods cost more. Even with faux leather, this project was a real challenge, and I ended up hand sewing part of it.
Want to make your own? To be honest, you should find a real sewing tutorial for leather, and do a bunch of practice. I am not a sewing expert, let alone know anything about working with these fabrics. So take my instructions with a grain of salt and have fun!
Supplies:
- Faux Leather
- Circular Bottom ~6″ in diameter
- Bottom Edge 19” x 2.25”
- Side Seam (Two) 2” x 5.25″
- Top Edge 1” x 19”
- Strap 2” x 19”
- Clear Vinyl
- Sides (Two) 9.5” x 5.25”
- Sewing machine
- Thread
- Needle
- Rotary Cutter (Optional)
- Scissors
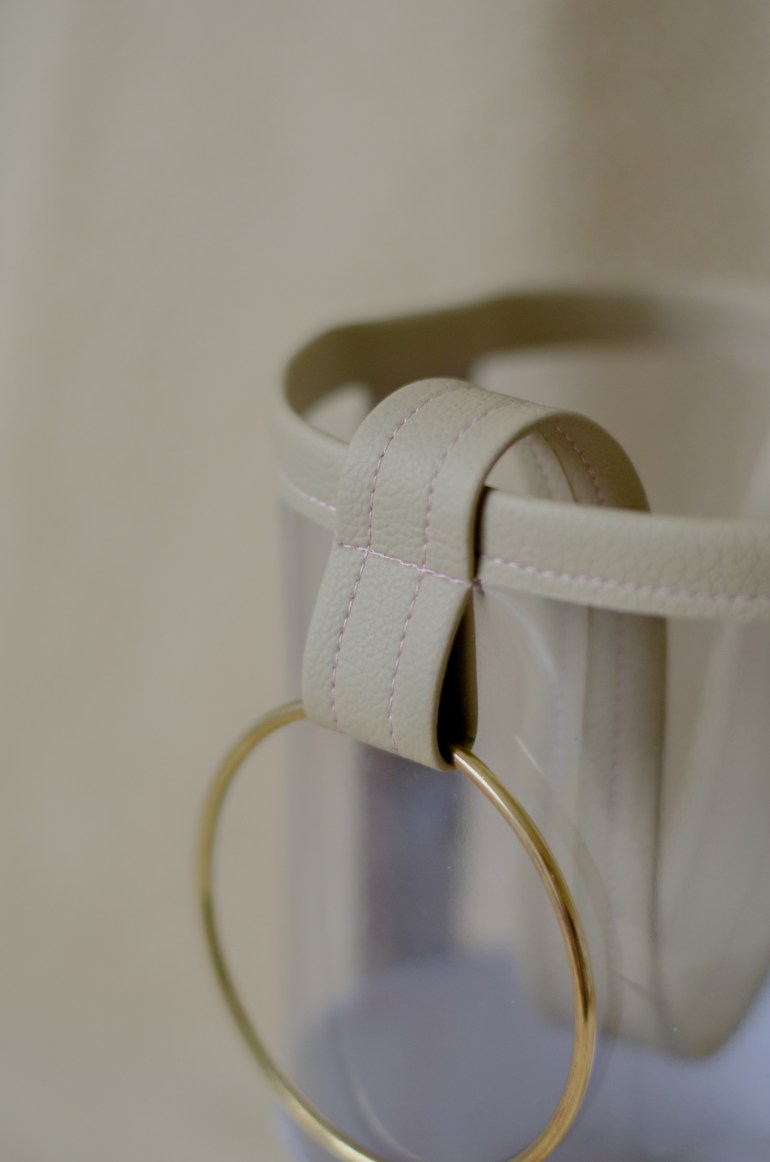
- Gold rings
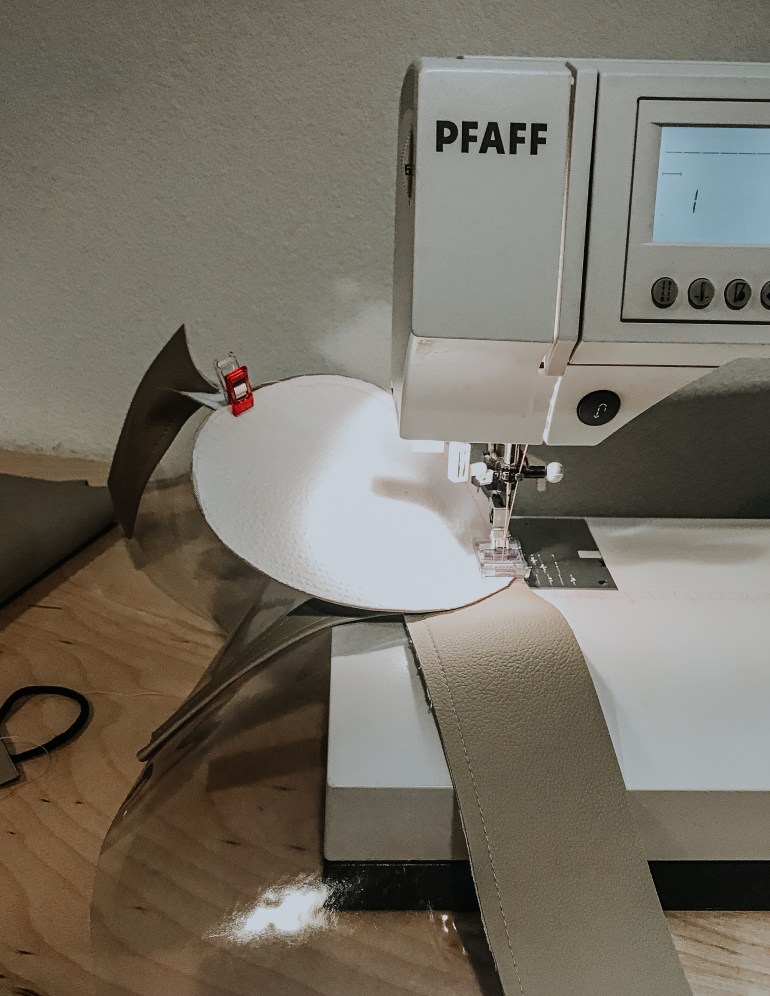
I recommend using a rotary cutter when cutting your leather & vinyl so you get a crisp cut. You should also use binder clips or sewing clips when holding the fabric together. Traditional pins will poke a hole that will not heal like in normal fabric.
Start by sewing one vinyl side to a side seam. Fold the leather in half matching the Vinyl with the folded edge of the leather (See photos). Sew the other piece of vinyl to the leather to create a complete seam. On the other end of one of the vinyl pieces, sew just half of the leather to create a seam. (You may want to trim some vinyl from this section, read on to see why). Do not close the loop yet.


Attach the bottom leather edge to the clear vinyl with a ¼” seam allowance. The vinyl should be on the inside of the leather band, right side to wrong side, so the seam is on the inside of the purse. Attach the bottom leather edge of the completed vinyl side starting at the unfinished side seam, leaving at least a 1-inch unsewn edge on the other end. This will help you with the assembly later.
Attach the round bottom to the bottom edge, aligning it with the unfinished side seam. Carefully sew the round bottom to the edge with the leather right sides together.
Once you sew up the round bottom to the side as much as you can, trim the seam allowance and flip the bag right side out. You may need to trim off some vinyl to make the sides match up. I ended up trimming off ~1 inch, which then made my seams not directly across from each other. you could trim off ~½” during the seam step above to make them more aligned. Hand sew the unfinished seam closed all the way to the top of the vinyl.
Fold the top edge in half and sew to the top of the vinyl, sandwiching the side seams between it. Start/finish the top edge ¼ of the way away from your side seam. We’ll cover this with the straps.
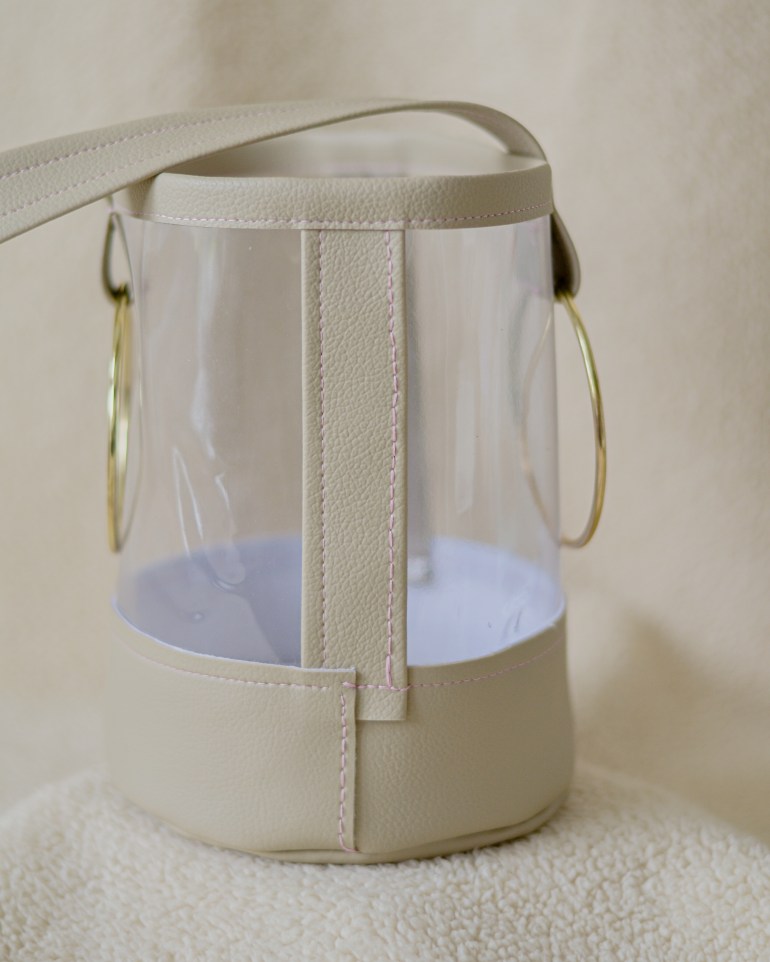
Fold and sew the strap in half to create a 1″ thick strap. Attach to the bag on the opposite quarters from the side seams. Sew the strap to the bag, right sides together with the seam facing down. Sew a second line 1 inch down from the lip of the Bag to secure it in place. Add a gold ring, then flip the strap up. Sew the strap to the bag again, 1″ up from the bottom, trapping the gold ring in the loop you created. Remember to add both gold rings to the strap before sewing down the second edge.
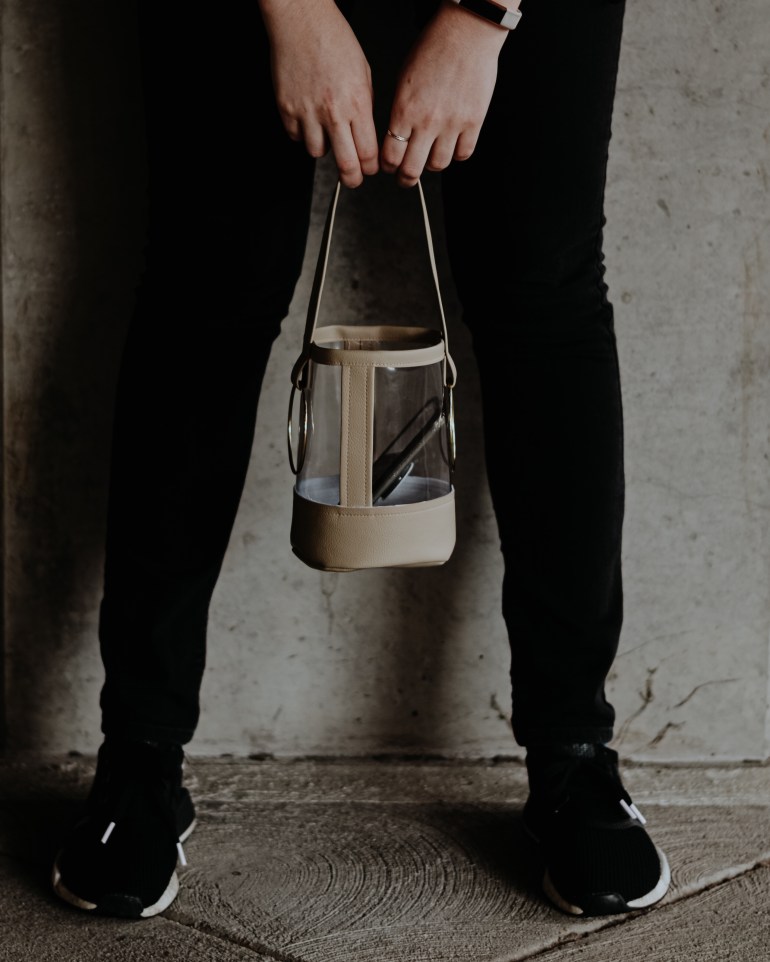
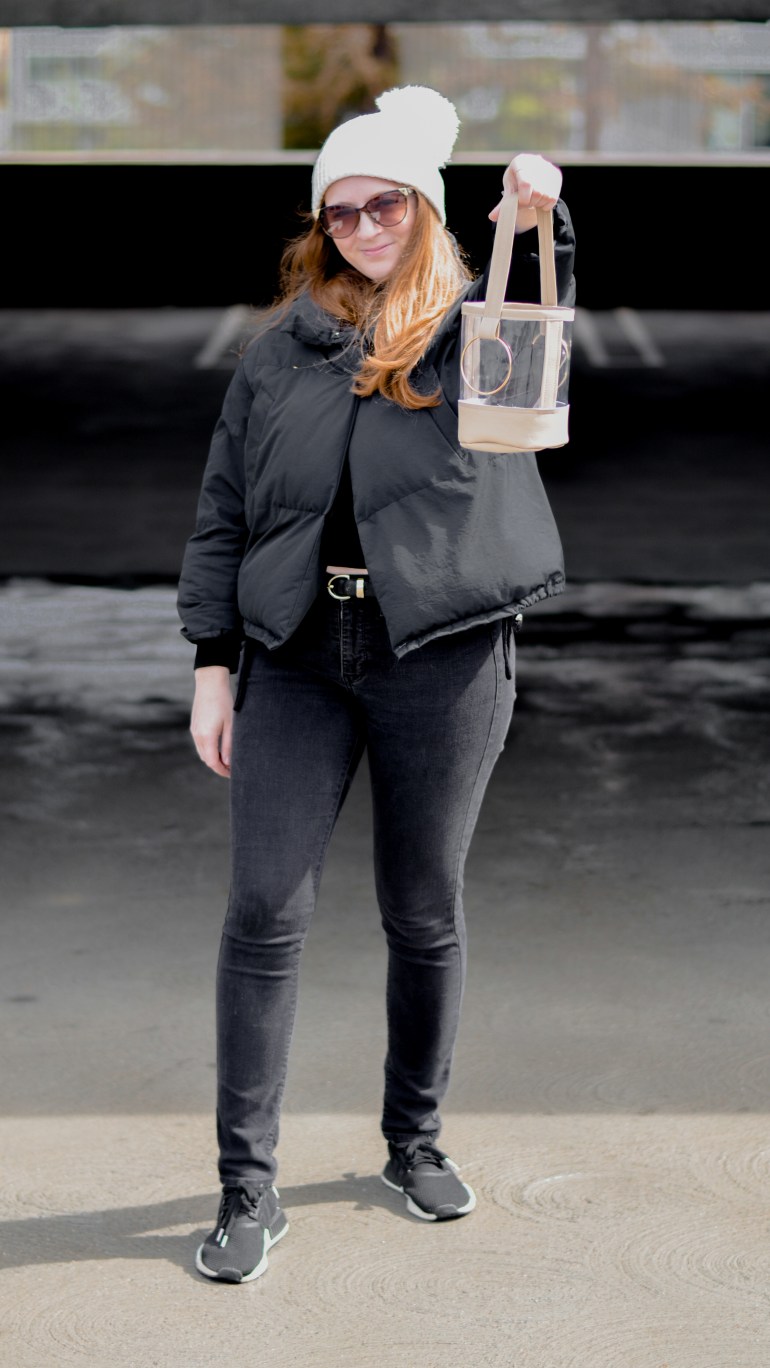
That’s it! For stability, I cut out a piece of round plastic to sit at the bottom of the bag. I may cover that with another leather piece as well. The only thing this Bag is missing is a matching interior pouch to store all of my items. I like how Shein had a fabric pouch in the original product.
Let me know if you could follow along with my instructions, I am working on getting better at explaining how to sew.

